
One of the most exciting and widely used techniques in modern music production is the pump effect. This dynamic audio effect can add energy, rhythm, and a unique character to your tracks, making them more engaging and impactful.
Whether you're working on electronic dance music, pop, or even rock, mastering the pump effect can take your mixes to the next level.
In this blog post, we’ll dive deep into the pump effect, exploring its nuances and teaching you how to harness its power in your productions.
From understanding the basics of compression to applying advanced techniques and troubleshooting common issues, you'll gain practical knowledge and skills to enhance your music.
By the end of this post, you'll be equipped to create professional, polished mixes that captivate listeners. So, let's get started on your journey to mastering the pump effect!

Understanding the Pump Effect
The pump effect is a phenomenon in music production where the volume of an audio track rises and falls in a rhythmic pattern, often synchronized with the beat of the music.
This effect is achieved primarily through the use of compression, where a compressor reduces the dynamic range of an audio signal, causing certain elements to stand out while others recede.
The result is a dynamic, breathing quality to the music that can make it feel more alive and energetic.
Definition and Role in Music Production:
The pump effect, also known as "pumping" or "breathing," is commonly used in various genres to add a sense of movement and excitement to a track. It’s particularly prevalent in electronic dance music (EDM), where the effect can enhance the groove and drive of the beat.
By carefully controlling the dynamics of the mix, producers can create a pulsating rhythm that complements the musical arrangement, making the track more compelling and danceable.
Examples in Music:
You can hear the pump effect in many popular songs across different genres. In EDM, tracks like "Strobe" by Deadmau5 and "Scary Monsters and Nice Sprites" by Skrillex showcase the pump effect prominently, with the kick drum triggering the compression and creating a pulsating rhythm.
In pop music, songs like "Closer" by The Chainsmokers use the pump effect subtly to add depth and movement to the mix.
Basic Principles Behind the Pump Effect:
At its core, the pump effect relies on the principles of compression. A compressor is an audio processing tool that reduces the dynamic range of a signal by lowering the volume of the loudest parts.
When set up correctly, the compressor can be used to create the pump effect by adjusting the following parameters:
- Threshold: The level at which the compressor starts to reduce the volume. Lowering the threshold will make the compressor more sensitive to the audio signal.
- Ratio: The amount of compression applied once the threshold is exceeded. Higher ratios result in more significant volume reduction.
- Attack: How quickly the compressor reacts to the incoming signal. A fast attack time can help capture transients and create a more pronounced pump effect.
- Release: How quickly the compressor stops reducing the volume after the signal falls below the threshold. A slower release time can enhance the rhythmic pumping.
By carefully balancing these settings, producers can achieve a wide range of pumping effects, from subtle to extreme, depending on the desired outcome.
Understanding the pump effect is the first step towards mastering it in your productions.
In the next section, we’ll discuss how to set up your mix for success before applying compression to create the pump effect. This preparation is crucial to ensuring your mixes sound clean, balanced, and professional.

Setting Up for Success
Before diving into the application of the pump effect, it's essential to set up your mix correctly. A well-prepared mix will make the process of applying compression smoother and more effective, leading to a cleaner and more professional sound.
Balance Your Levels:
Start by ensuring that the levels of all your tracks are well-balanced. Each element in your mix should be audible and sit comfortably in the mix without overpowering others. Use volume faders to achieve this balance, paying particular attention to the relationship between the kick drum, bass, and lead elements, as these will often be the focus of the pump effect.
Remove Unwanted Noise:
Clean up your tracks by removing any unwanted noise, clicks, pops, or hums. Use tools like noise gates, de-noisers, or manual editing to ensure a pristine audio signal. This step is crucial because compression can amplify any noise present in your tracks, making it more noticeable.
Set Up Buses and Sends:
Organize your mix by grouping similar tracks into buses. For example, create separate buses for drums, vocals, and instruments. This setup allows you to apply compression to groups of tracks simultaneously, creating a more cohesive sound. Use sends to route specific elements to auxiliary channels for effects like reverb and delay, keeping your mix organized and flexible.
Using Reference Tracks
Reference tracks are professionally mixed and mastered songs that you use as a benchmark for your mix. They can help you gauge the quality and balance of your mix, ensuring it stands up to commercially released music.
- Choose Appropriate Reference Tracks: Select reference tracks that match the genre and style of your music. Ideally, these should be songs you admire for their sound quality and dynamic range.
- Use REFERENCE Plugin: Mastering The Mix's REFERENCE plugin is a powerful tool for comparing your mix to your reference tracks. Load REFERENCE as the final plugin on your master channel, drag and drop your reference tracks into the UI, and switch between your mix and the reference to identify differences in tonal balance, stereo spread, and punch.
- Match Loudness Levels: Ensure that the perceived loudness of your mix matches that of the reference track. This step is crucial because louder tracks can seem fuller and more detailed. REFERENCE can automatically match the loudness, allowing you to make fair comparisons and informed mix decisions.
By preparing your mix and using reference tracks effectively, you'll create a solid foundation for applying the pump effect with compression.

Applying Compression to Achieve the Pump Effect
Now that your mix is well-prepared, it’s time to apply compression to create the pump effect. This section will guide you through the process, from setting up a basic compressor to fine-tuning its parameters for the desired effect.
Setting Up the Compressor
Step 1 - Insert the Compressor: Add a compressor to the track or bus where you want to create the pump effect. For a typical EDM track, this might be the drum bus or the master bus, where the kick drum and other rhythmic elements are most prominent.
Step 2 - Adjust the Threshold: The threshold determines the level at which the compressor starts to work. Set the threshold so that it reacts to the peaks of the kick drum or other dominant elements. This setting will depend on the input level of your tracks, so adjust until you see the compressor engaging primarily with the kick hits.
Step 3 - Set the Ratio: The ratio controls the amount of gain reduction applied once the signal exceeds the threshold. For a noticeable pump effect, start with a ratio between 4:1 and 8:1. Higher ratios will create a more pronounced effect, while lower ratios will be subtler.
Step 4 - Dial in the Attack Time: The attack time dictates how quickly the compressor responds to incoming signals. For a strong pump effect, use a fast attack time (1-10 ms) to catch the transient peaks of the kick drum and other percussive elements.
Step 5 - Adjust the Release Time: The release time determines how quickly the compressor stops reducing the gain after the signal falls below the threshold. A slower release time (100-300 ms) can enhance the pumping sensation by allowing the volume to swell back up gradually. Experiment with the release time to sync with the tempo of your track, creating a rhythmic breathing effect.
Step 6 - Set the Makeup Gain: After compression, your overall signal level might be lower. Use the makeup gain to compensate for the reduction, bringing the overall level back up without losing the dynamic effect created by the compressor.
The settings above are starting points. Experiment with different attack, release, and ratio settings to find what works best for your track. Listen carefully to how the changes affect the groove and energy of your mix.
Example Settings for Different Genres
- EDM/House: Fast attack (1-5 ms), slow release (150-300 ms), high ratio (6:1-8:1).
- Pop: Moderate attack (5-10 ms), moderate release (100-200 ms), moderate ratio (4:1-6:1).
- Rock: Slower attack (10-20 ms), faster release (50-150 ms), lower ratio (3:1-5:1).
By carefully setting up and fine-tuning your compressor, you can achieve a powerful pump effect that enhances the energy and dynamic feel of your tracks. In the next section, we’ll explore how to enhance the pump effect further using sidechain compression techniques.

Enhancing the Pump Effect with Sidechain Compression
To take the pump effect to the next level, sidechain compression is a powerful technique that allows one audio signal to control the compression of another. This is particularly useful for making the kick drum punch through a busy mix, creating a dynamic, rhythmic pumping effect that adds energy and movement to your tracks. Mastering The Mix's FUSER plugin is an excellent tool to achieve this.
Introduction to Sidechain Compression
Sidechain compression involves using an external audio signal (sidechain input) to trigger the compressor on another track. Typically, the kick drum is used as the sidechain input, causing the compressor to duck the volume of other elements (like bass or synths) whenever the kick hits. This creates space for the kick drum, ensuring it remains prominent in the mix and enhancing the overall groove.
Setting Up Sidechain Compression with FUSER
Step 1 - Choose the Source and Target: Decide which track will act as the sidechain input (e.g., kick drum) and which track will be affected by the compression (e.g., bass, synths, or even the entire mix bus).
Step 2 - Insert FUSER on the Target Track: Add FUSER to the track you want to be affected by the sidechain input. FUSER is designed to simplify the sidechain compression process while providing advanced features for precise control.
Step 3 - Route the Sidechain Input: Route the kick drum (or your chosen source) to the sidechain input of FUSER. This can typically be done in the plugin settings or within your DAW’s routing options.
Step 4 - Set the Compressor Parameters:
A) Create A Node: Double to click to create a node to initiate processing.
B) Threshold: Adjust the vertical position of the node to adjust the threshold so that FUSER engages when the kick drum hits. The lower the vertical position, the greater the processing. The goal is to create noticeable gain reduction without overly squashing the target track.
C) Q Bandwidth: Adjust the Q bandwidth to affect the desired range of frequencies.
D) Attack and Release: Use a fast attack time (1-5 ms) to quickly respond to the kick drum and a moderate release time (100-300 ms) to allow the volume to swell back up rhythmically. Adjust the release time to sync with the tempo of your track.

Fine-Tuning Sidechain Compression with FUSER
- Listen for Clarity and Impact: The goal is to create a pumping effect that enhances the rhythm without making the mix sound unnatural. If the pumping is too aggressive, reduce the threshold or ratio.
- Experiment with Different Sources: While the kick drum is commonly used, try sidechaining other rhythmic elements like snares or hi-hats for unique effects.
- Layer Multiple Sidechain Compressors: For complex mixes, consider using multiple instances of FUSER on different elements to create intricate pumping patterns.
Advanced Techniques with FUSER
- Spectral Sidechain Compression: FUSER allows you to apply sidechain compression to specific frequency ranges. This lets you duck only the low frequencies of the bass when the kick hits, preserving the clarity of higher frequencies.
- Mid-Side Precision: Apply the ducking to either the mid, or side or both (stereo).
- Automation: Automate FUSER’s parameters for dynamic changes throughout the track. For example, increase the release time during a breakdown to create a more dramatic pumping effect.
By mastering sidechain compression with FUSER, you can achieve a dynamic, rhythmic pump effect that enhances the groove and energy of your tracks, making your mixes more engaging and professional.

Troubleshooting Pumping Issues
Over-Compression
- Problem: The mix sounds squashed and lifeless due to excessive compression.
- Solution: Increase the threshold or reduce the ratio. Use a slower attack time to preserve transients.
Pumping in Unwanted Frequencies
- Problem: The pump effect is affecting frequencies that should remain steady.
- Solution: Use a spectral processing to isolate and compress only the desired frequency ranges.
Phase Issues
- Problem: The mix sounds hollow or phasey, often due to stereo width adjustments or multiple compressors.
- Solution: Check phase correlation using a phase meter. Adjust panning and stereo width settings to avoid phase cancellation.
Loss of Dynamics
- Problem: The mix lacks dynamic range, sounding flat and uninteresting.
- Solution: Use a lower compression ratio and higher threshold. Introduce manual volume automation to enhance dynamics.
Advanced Tools and Plugins
- REFERENCE: Use Mastering The Mix’s REFERENCE plugin to compare your mix against professional tracks and ensure your pump effect is balanced and effective.
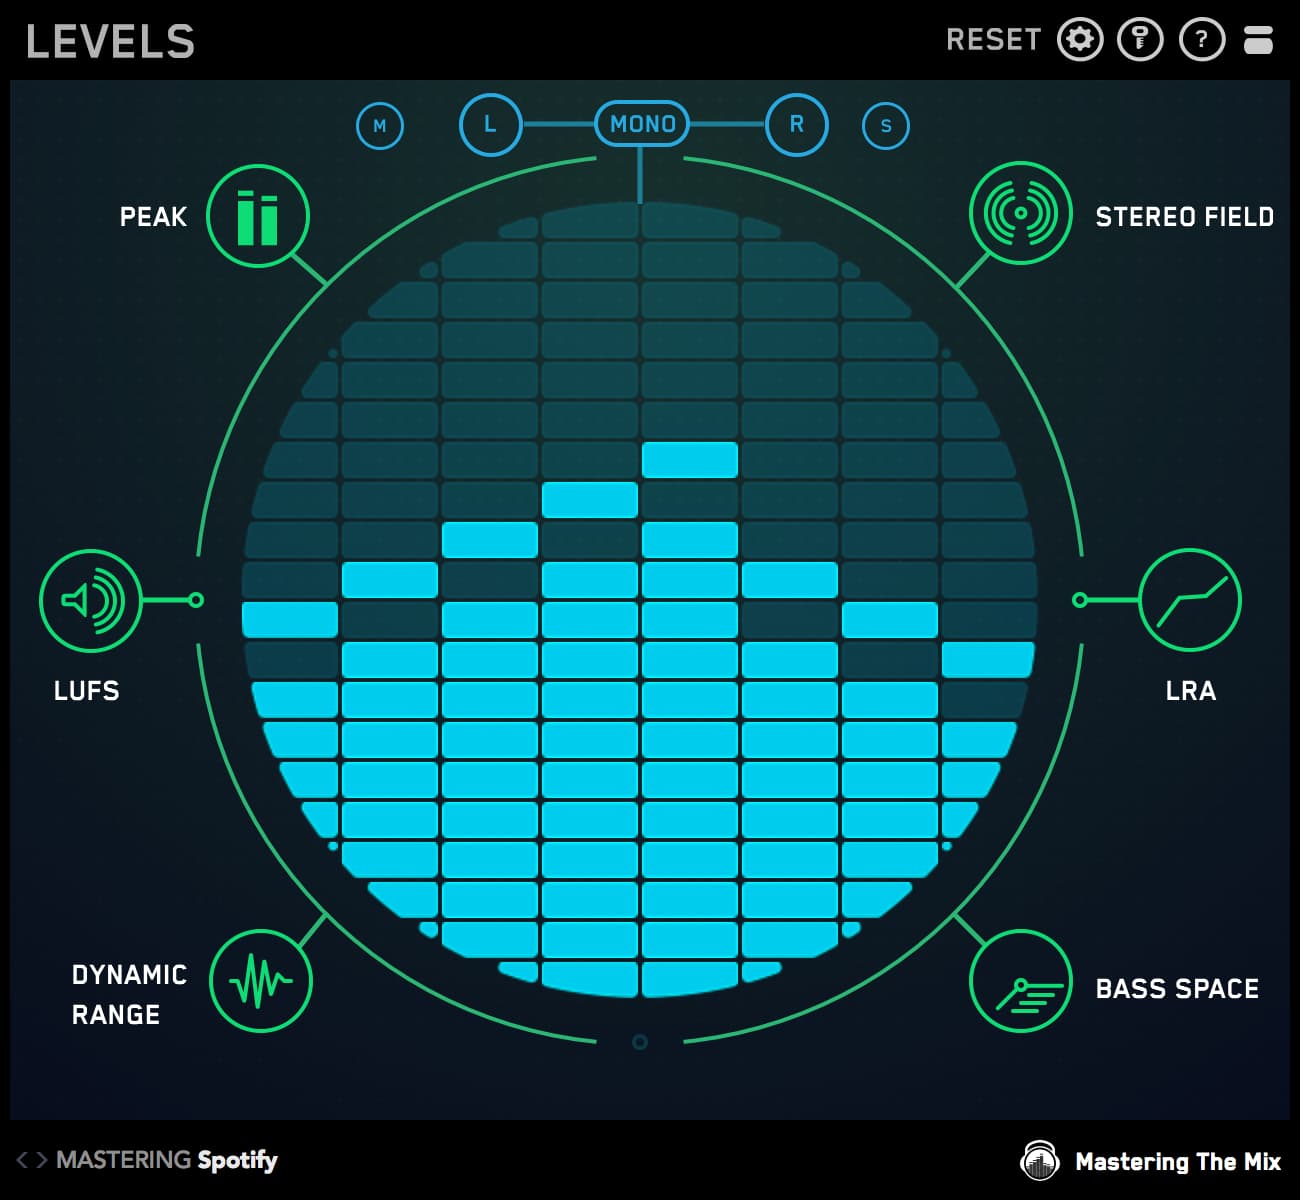
- LEVELS: Monitor your mix’s loudness, peaks, dynamic range, and stereo field to ensure technical precision.
- LIMITER: Finalize your mix with a transparent limiter that controls true peaks and maintains the integrity of your mix.
By incorporating these advanced techniques and addressing common issues, you'll refine your pump effect application, leading to more polished and professional mixes.

Tools and Plugins for Mastering the Pump Effect
Achieving a professional and polished pump effect requires not only a solid understanding of compression techniques but also the right tools and plugins. Here are some recommended plugins from Mastering The Mix that can help you master the pump effect and elevate your music production.
1. LEVELS is an essential metering plugin designed to help you achieve a technically sound mix. It provides detailed insights into your audio's peaks, loudness, dynamic range, and stereo field, ensuring your mix is balanced and free from technical issues.
- Peak and RMS Metering: Monitor your mix's peaks and RMS levels to ensure you're leaving enough headroom for mastering.
- Dynamic Range Monitoring: Check the dynamic range to ensure your mix is neither over-compressed nor too dynamic.
- Stereo Field Analysis: Visualize the stereo width and ensure a balanced mix.
Using LEVELS, you can ensure that your mix is technically perfect before applying the pump effect, preventing any unwanted artefacts and maintaining clarity.
2. REFERENCE is a powerful plugin that allows you to compare your mix against professional tracks. This comparison helps you identify any differences in tonal balance, stereo spread, and punch, guiding you to make informed mix decisions.
- A/B Testing: Seamlessly jump back and forth between the track your working on and the reference tracks.
- Perceived Loudness Matching: Automatically matches the loudness of your reference tracks to your mix, ensuring a fair comparison.
- Trinity Display: Visualize tonal balance, stereo width, and punch, and see how your mix compares to the reference tracks.
REFERENCE is invaluable for ensuring your mix sounds as professional as commercially released tracks, helping you dial in the perfect pump effect.
3. LIMITER is a versatile plugin designed to maximize loudness while maintaining transparency. It analyzes your music and provides target ranges for loudness and true peaks, helping you achieve the perfect balance.
- Gain, Attack, Release, Link, and Ceiling Controls: Optimize these settings to achieve the desired loudness and transparency.
- Target Ranges: Visual cues help you dial in the ideal settings for your music, whether you're aiming for a loud master or optimizing for streaming platforms.
- Transparency Algorithm: Ensures your mix maintains its integrity and dynamic range while controlling true peaks.
LIMITER is perfect for finalizing your mix and ensuring the pump effect is polished and professional.
4. BASSROOM is an advanced EQ plugin focused on optimizing the low-frequency balance of your track. It's particularly useful for ensuring your bass and kick elements are well-balanced and powerful.
- EQ Targets: Provides EQ target suggestions based on your reference tracks, ensuring a balanced low end.
- Unique Filters: Designed specifically for low-frequency shaping, maintaining punch and clarity.
- Level Match: Helps you objectively assess EQ adjustments by matching input and output loudness levels.
BASSROOM ensures that your low end is solid, powerful, and well-balanced, enhancing the impact of the pump effect.
5. MIXROOM is an intelligent EQ plugin for shaping the mid and high frequencies of your mix. It helps you achieve a clear and balanced tonal balance across the entire frequency spectrum.
- EQ Targets: Generates tonal balance targets based on your reference tracks, guiding your EQ decisions.
- Mid-Side Processing: Allows precise control over the stereo field, ensuring clarity and definition.
- Level Match: Ensures your EQ adjustments are effective by maintaining consistent loudness levels.
MIXROOM helps you fine-tune your mix's tonal balance, making the pump effect more effective and polished.
6. FUSER is a specialized plugin designed to enhance the pump effect through sidechain compression. It provides advanced features to control the dynamics and create a rhythmic, pumping effect.
- Sidechain Compression: Easily set up sidechain compression to allow one signal (like a kick drum) to control the compression of another track (like bass or synths).
- Spectral Processing: Apply sidechain compression to specific frequency ranges for more precise control.
- Automation Capabilities: Automate FUSER's parameters for dynamic changes throughout the track, enhancing the rhythmic impact.
- Visual Feedback: Clear visual interface to see how the compression is affecting the audio, making it easier to fine-tune the settings.
Using FUSER, you can achieve a dynamic and rhythmic pump effect that enhances the energy and movement of your tracks, ensuring your mixes are both engaging and professional.
By using these tools and plugins from Mastering The Mix, you can achieve a professional pump effect that enhances the energy and impact of your tracks. Experiment with these plugins and refine your techniques to create dynamic, engaging mixes that captivate listeners.
Conclusion
Mastering the pump effect in music production can transform your mixes, adding dynamic movement and enhancing the overall groove. By understanding the basics of compression, setting up your mix correctly, and utilizing advanced techniques like sidechain compression, you can achieve a polished and professional sound.
Using tools like LEVELS, REFERENCE, LIMITER, BASSROOM, MIXROOM and FUSER from Mastering The Mix, you can ensure your mixes are technically sound and artistically compelling. These plugins provide the precision and flexibility needed to fine-tune your pump effect, making your tracks stand out in any genre.
Now that you have a comprehensive understanding of the pump effect and the tools to achieve it, it's time to put this knowledge into practice. Experiment with different settings, refine your techniques, and let your creativity flow. With dedication and the right tools, you'll be able to create mixes that not only sound great but also move and engage your listeners.
To further enhance your music production skills, consider trying out the free trials of Mastering The Mix plugins, signing up for our newsletter for more tips and tutorials, and following us on social media for the latest updates. Let's make your mixes sound better than ever!


