TL;DR:
Jake struggled with mix translation—his track sounded great in the studio but fell apart on other systems. By using BASSROOM to balance low frequencies and REFERENCE to compare against professional mixes, he identified tonal imbalances and made precise adjustments. These tools helped him create a mix that sounds consistent across all playback devices. If your mixes don’t translate well, analyzing tonal balance and using reference tracks can make a huge difference! 🚀
Introduction
Picture this: Jake, an up-and-coming electronic producer, was having what he called a "studio victory moment." He had just wrapped up a mix that felt perfect—every synth was shimmering, every drum hit landed with impact, and his bass line grooved just right. He leaned back in his chair, hit "export," and sent the track to a few trusted friends, eager to bask in their admiration.
Hours passed, and the first replies rolled in. "It’s good, but the bass feels muddy," said one friend. Another chimed in, “The vocal doesn’t really cut through—hard to understand the lyrics.” One reply hit hardest of all: "Sounds okay in headphones, but on my car speakers, it’s a mess."
Jake’s heart sank. This wasn’t the feedback he was expecting. How could something that sounded incredible in his studio fall apart everywhere else? Frustrated and determined to understand what went wrong, Jake set out on a journey that would transform not just his mixes, but his entire approach to music production.

The Illusion of the Perfect Studio
Jake started where most producers do: blaming his gear. “If only I had better monitors,” he thought, scrolling through forums filled with debates over studio equipment. But after hours of research, a realization struck him—it wasn’t the gear; it was his technique. Even the best monitors wouldn’t solve the underlying problem: his mix didn’t translate well to different playback systems.
That realization was a gut punch. Jake thought back to his mixing process. He had been so caught up in the creative flow—tweaking synth patches, layering effects, and pushing levels—that he hadn’t taken a step back to analyze his work critically. Could it be that his mix, no matter how carefully crafted, was doomed by poor habits?

The Power of Perspective
Determined to fix the issue, Jake turned to the advice of seasoned producers online. One recurring theme caught his attention: using reference tracks.
He learned that comparing his mix to professionally produced songs could highlight problems he might have missed. But Jake had no idea where to begin. Which tracks should he choose? How could he make fair comparisons?
Jake started by picking a few tracks he admired—songs in the same genre, with similar instrumentation and vibe. Using the plugin REFERENCE, he loaded his chosen tracks into his DAW.
He was shocked at what he heard. His mix sounded muffled compared to the crisp clarity of the references. The bass in his track wasn’t just muddy; it was overpowering. His vocal, which he thought was the star, was buried under layers of synths.
For the first time, Jake wasn’t just hearing his mix—he was analyzing it. This new perspective revealed flaws he hadn’t noticed before, and the path forward started to come into focus.

Taming the Low-End Beast
The low end was Jake’s first target. He discovered that his kick and bass were fighting for dominance, creating a chaotic rumble that muddied the mix. He turned to FUSER, a plugin designed to resolve frequency conflicts. With its intuitive "Conflict Detection" feature, FUSER highlighted exactly where the kick and bass were overlapping.
Jake used FUSER’s sidechain ducking to make space for the kick without completely muting the bass. Then, with the phase optimization tool, he minimized phase cancellation, ensuring the low-end elements worked together instead of against each other. The difference was night and day—suddenly, his track had punch and clarity.
But Jake didn’t stop there. He realized the bass itself needed some EQ work. Using the frequency display in FUSER, he identified resonances that were dominating the mix and applied subtle cuts to tame them. For the first time, the low end of his track felt controlled and professional.

Dialling in the Perfect Low-End Balance
Now that Jake was hearing the kick and bass clearly, thanks to resolving their conflict with FUSER, he noticed something else. Compared to his reference track, the low end in his mix felt a bit too weak. The punch was there, but it lacked the fullness and power he knew was essential for the genre. His mix needed more weight in the low end, but finding the right balance without overpowering the rest of the track was a challenge.
To tackle this, Jake turned to BASSROOM, a mastering-grade EQ designed specifically for shaping low-end frequencies. He imported his reference track into BASSROOM as a sonic target—one he knew sounded incredible on his car speakers—and let the plugin analyze the tonal characteristics. Instantly, BASSROOM displayed precise adjustments Jake could make to achieve a similar low-end balance.
With the recommendations in front of him, Jake boosted the sub-bass to add weight to the kick and bass. He also made a subtle cut around 200 Hz to prevent the low-mids from becoming too boxy or muddy. These changes brought his mix closer to the power and clarity of his reference track, while still maintaining its unique character.
What made the process seamless was how BASSROOM displayed the suggested changes in a clear and intuitive way. Jake could tweak the amount of boost or cut as needed, ensuring it aligned with his creative vision. After adjusting the levels and A/B comparing with his reference, the low end in Jake’s mix was now tight, balanced, and powerful—exactly what it needed to stand out on any system.

Making Vocals Shine
Next, Jake turned his attention to the vocals. Comparing his mix to the reference tracks, it was clear the tonal balance of his vocal was off. It sounded harsh in the mids and lacked warmth in the lows. That’s when Jake remembered reading about MIXROOM, a plugin designed to help producers dial in perfect EQ balance.
Jake imported an acapella from one of his favorite tracks into MIXROOM as a sonic target. Instantly, the plugin analyzed the tonal characteristics of the reference and gave Jake precise EQ adjustments to apply to his vocal. As he followed the recommendations—boosting the warmth around 200 Hz, cutting boxy midrange frequencies at 400 Hz, and adding a touch of air around 10 kHz—the vocal began to pop in the mix like never before.
Being a perfectionist, Jake tweaked a few parameters further to match his creative vision. He carefully adjusted the relative volume of the vocal to ensure it sat perfectly in the mix when compared to his reference. The result was stunning: the vocal sounded polished, clear, and professional, sitting proudly at the forefront of the track without overpowering the other elements.

The Stereo Width Dilemma
With the low end and vocals sorted, Jake shifted his focus to stereo width. His initial mix was wide but unfocused, with elements bleeding into each other. Using REFERENCE, he compared the stereo spread of his track to his reference songs. The differences were striking.
Jake learned that not everything in a mix needs to be wide. He kept the bass and kick centered, while subtly widening the synth pads and percussion. He decided to pan a few subtle individual elements left or right. This approach added depth and clarity without overwhelming the mix. The stereo width display in REFERENCE was instrumental in fine-tuning these adjustments.

Somethings Wrong...
As Jake played back his mix, something still felt off. It wasn’t the balance or the EQ this time, but there was a strange, almost unnatural quality in certain areas of the frequency spectrum. It wasn’t immediately obvious, but the sound had a harshness that made listening fatiguing, especially during louder sections. To fix this, Jake turned to RESO, a plugin designed to identify and resolve resonances dynamically.
Use the buttons below to switch between the "Before" and "After" audio examples and hear the difference RESO can make in your mix.
Using RESO’s sweep feature, Jake held the control key and swept his mouse across the frequency spectrum, slightly exaggerating resonances as he listened carefully. Sure enough, he found a few problem areas where certain frequencies were ringing unpleasantly. He created nodes at the worst resonances and subtly reduced their levels. This process smoothed out the sound, removing the harshness and making the overall mix much more pleasing to the ear. With RESO, Jake’s track now had a polished, natural quality that elevated it to a professional level.

The Loudness Puzzle
Finally, Jake tackled the loudness. He realized his mix was too quiet compared to his references, but pushing the volume with a limiter had introduced distortion in the past. This time, he used LIMITER, a plugin designed for clean and transparent loudness adjustments.

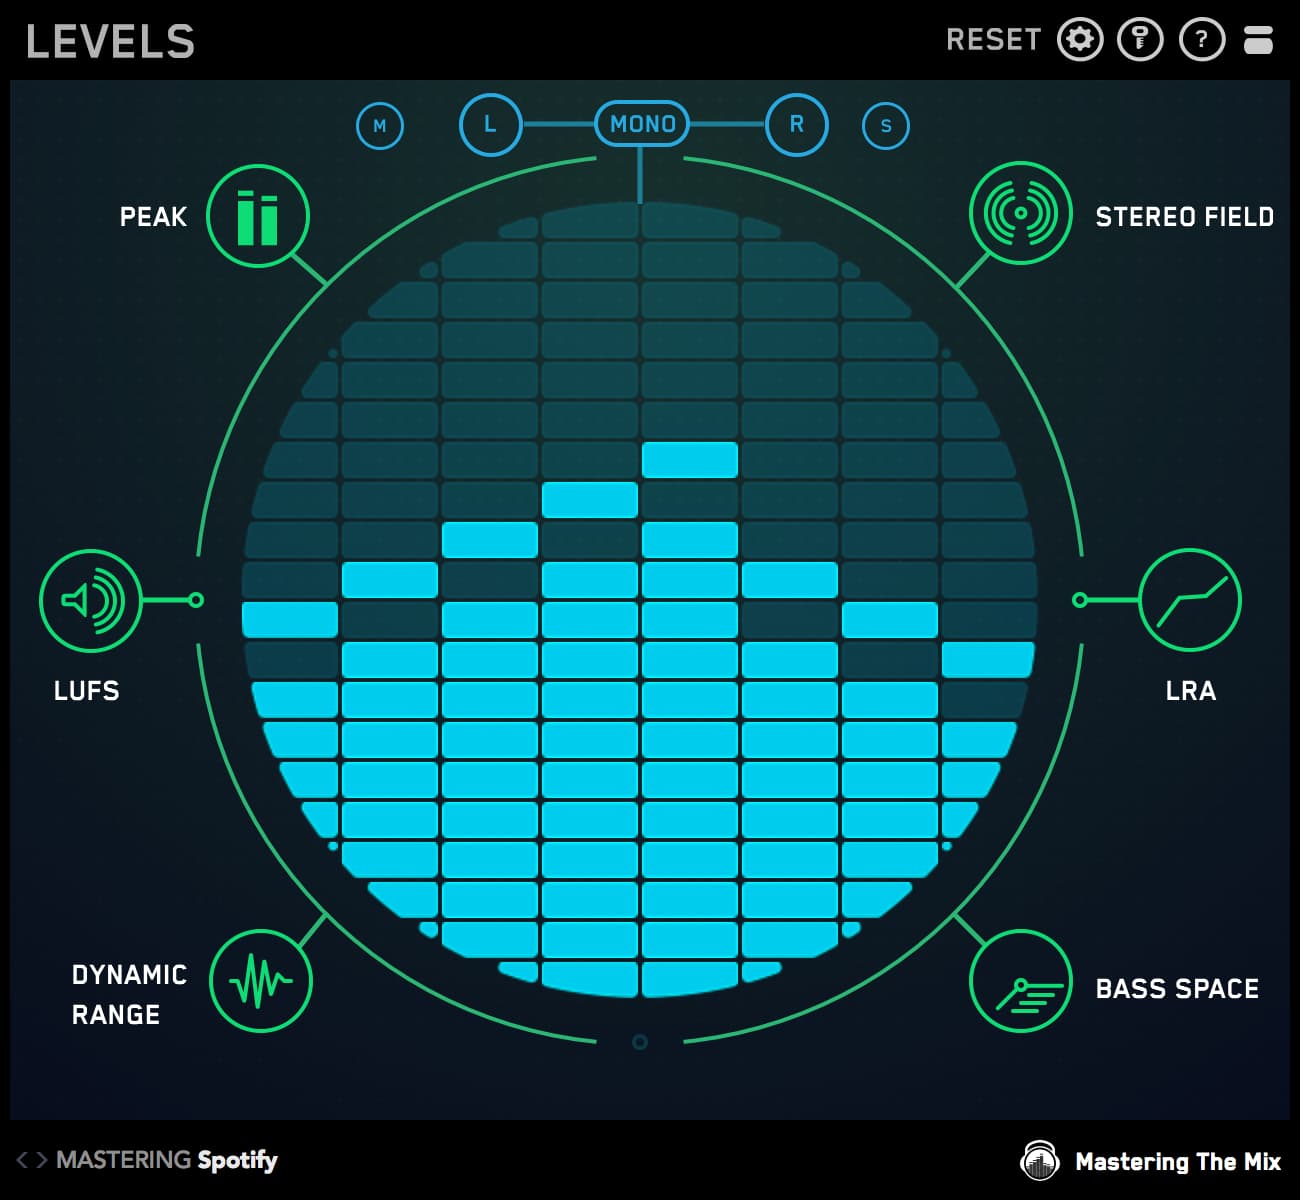
Jake started by analyzing the loudest section of his track, ensuring it met the LUFS target for club playback (-6 LUFS short-term). LIMITER’s smart suggestions helped him find the perfect balance between loudness and dynamics, preserving the energy of his mix without crushing it.

A Mix That Translates
After weeks of hard work, Jake finally had a mix he was proud of. He played it on every system he could find—studio monitors, car speakers, earbuds, even his phone’s tiny speaker. The result was consistent and satisfying across all of them. His friends noticed the difference too, praising the clarity, punch, and balance of his track.
Jake’s journey was a testament to the importance of perspective and the power of the right tools. By incorporating reference tracks and leveraging plugins like FUSER, REFERENCE, MIXROOM, and LIMITER, he turned a frustrating experience into a learning opportunity. Jake didn’t just fix his mix; he leveled up as a producer.
Your Journey Awaits
If you’ve ever felt the sting of a mix that doesn’t translate, take heart—you’re not alone. Follow Jake’s example: analyze your mix critically, use reference tracks, and embrace tools that empower you to make informed decisions. With patience and persistence, you can create music that sounds incredible everywhere, from the club to your car stereo. Your masterpiece is closer than you think.


