Saturation is a versatile mixing tool that can make your tracks sound fatter, help tracks cut through the mix, or glue tracks together. But, when used incorrectly, it can mangle and distort your mix beyond repair. In this blog, you'll learn about the different types of saturation and how to use them to bring your mixes to life.

What Is Saturation?
Saturation occurs when the electrical components of a piece of hardware are overloaded. When an electrical component (like a transistor, vacuum tube or magnetic tape) can no longer handle the incoming electrical signal, the output becomes non-linear to the input, resulting in compression and distortion.
Saturation introduces soft-knee compression, which means the ratio becomes more aggressive as the input increases. This results in a more gradual compression effect that is more subtle. For instance, if you just barely overload a circuit, it may apply compression at a ratio of 2:1, but as you increase the input gain, the ratio could be as high as 4:1 or higher.

Technically, any form of processing is distortion, but when discussing saturation, we're referring to harmonic distortion.
Harmonic distortion causes small spikes in amplitude known as harmonics, which are a multiple of the incoming signal frequency—meaning they work harmoniously with the original signal.
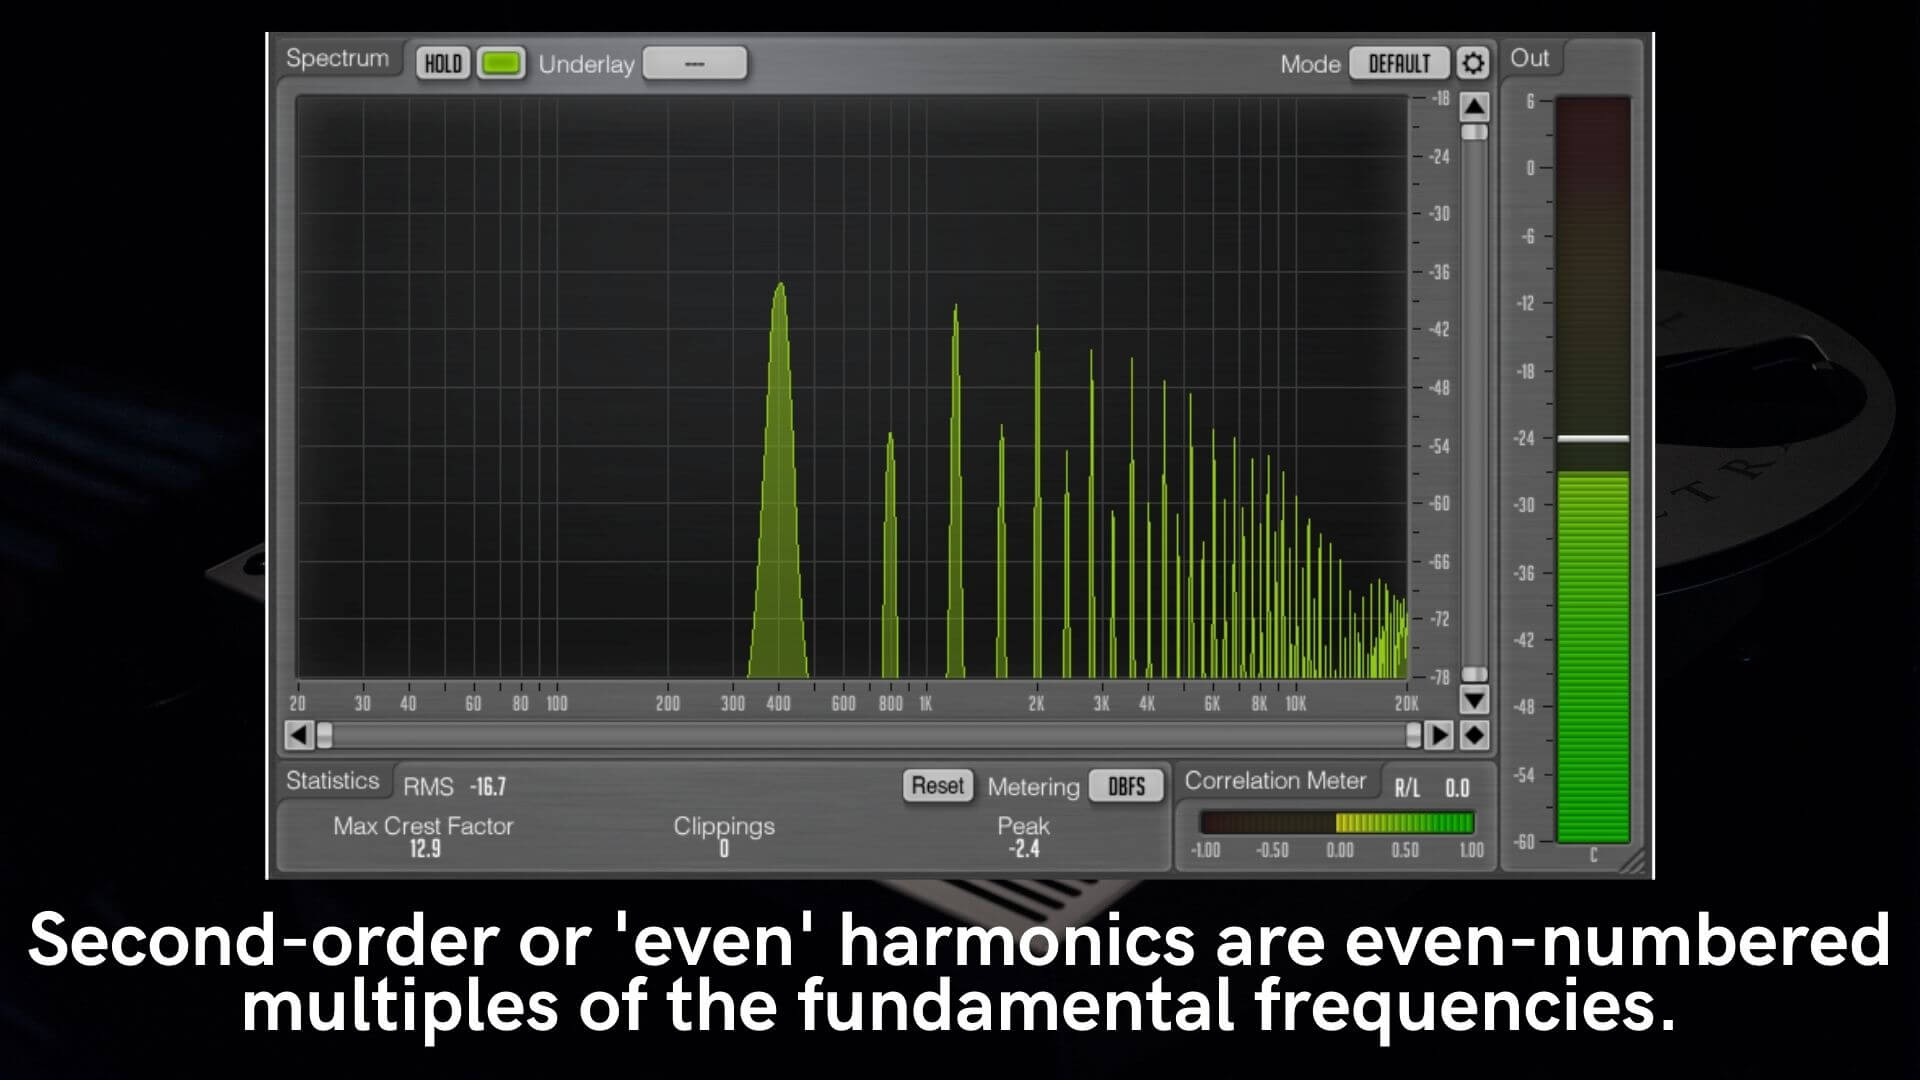
Second-order or 'even' harmonics are even-numbered multiples of the fundamental frequencies. For instance, when adding second-order harmonics to a 200 Hz sine wave, you'll see additional spikes at 400 Hz, 800 Hz and 1200 Hz. Second-order harmonics tend to create a warm, vintage sound.

Third-order or 'odd' harmonics are odd-numbered multiples of the fundamental frequencies. When adding third-order harmonics to a 200 Hz sine wave, you'll see additional spikes at 600 Hz, 1000 Hz and 1400 Hz. Third-order harmonics sound more aggressive and in-your-face than second-order harmonics.

The effects of harmonic distortion vary greatly depending on a number of factors, including the type of electrical component used, the amplitude of the incoming signal, and the frequency of the incoming signal.
Distortion vs Saturation
As mentioned above, distortion comes in many forms, including:
-
Harmonic distortion
-
Intermodulation distortion
-
Phase distortion
-
Bit depth distortion
Intermodulation distortion occurs when two or more signals combine in a non-linear way, creating additional noise that can interfere with the sound. This is one of the most common forms of intentional distortion and is often used in guitar pedals and amplifiers.
Phase distortion occurs when one or more signals in a multi-track session is phase-shifted, either by a circuit or filter that is not responding linearly, which can cause your mix to sound like it's playing underwater.
When working with digital audio, we use quantization and bit depth to measure the amplitude value of a waveform over time. Bit depth distortion (also known as quantization distortion) occurs when a waveform is rounded to a bit depth that doesn't accurately represent its amplitude. This issue is common when working at lower bit depths, due to the limited number of bits available.
Now that you understand the different types of distortion, let's take a look at some of the different flavors of harmonic distortion you can use in your mixes.

Types of Harmonic Distortion
One of the earliest forms of harmonic distortion came from driving vacuum tubes used in vintage analog audio equipment. It's important to note that all analog components produce both second and third-order harmonics.
While specific sound varies depending on the type of tube, tubes tend to generate more second-order harmonics, producing a warm, rich tone. And since second-order harmonics are lower than their third-order counterparts, tubes are great for fattening up your mix with powerful low-end.

As technology advanced, tubes began to fall out of fashion as the primary component used in analog audio gear. Instead, they were replaced by transistors and transformers, which are cheaper, smaller and less fragile. Today, most hardware saturation is created by transistors and transformers.
While these components were designed to emulate the sonics of tubes, transistors and transformers generally produce more third-order harmonics, resulting in more mid and high frequencies. Depending on the quality of the components, this can make your tracks sound brighter and more defined, helping them cut through the mix.
However, this can vary greatly from unit to unit, which is why transistors and transformers are not often associated with a particular frequency response like tubes but results in a fuller, more complex sound.

Analog tape is also capable of producing harmonic saturation, although it’s accomplished in a different way than tubes and transistors. Instead of using an electrical component like a tube or transistor to amplify the signal, magnetic tape is used to record the audio. When the signal exceeds the limits of what the tape can store, it creates harmonic saturation.
Tape generates both even and odd-order harmonics, producing a rich, balanced tone. Additionally, tape machines typically introduce other forms of distortion as well due to the components used to amplify the signal. Experiment with different tape machines and different types of tape to find the sound you're looking for.
Tape machines are also known for rolling off the high-end, which creates a warm, classic sound. While a properly calibrated tape machine is capable of accurately recreating high-frequencies, most analog tape machines in studios began to lose their shimmer and shine over time. This can be a cool effect when you want to give your track a vintage vibe, but can also make your mix sound dull or muddy when overused.

Sometimes running a track through tubes, tape and transistors can overpower your mix. Tubes can make your tracks sound muddy, transistors can make them sound harsh, and tape can make them sound dull. That's where dynamic harmonic distortion comes in.
Plug-ins like IGNITE make it easy to dial in the sound you're looking for. Use the filter section to focus on the frequencies that matter most. Roll-off the lows to prevent muddiness and cut the highs to keep your mix from sounding harsh or aggressive. Use the threshold to trigger distortion only when you want to, keeping your mix clean and clear until it's time to kick it into overdrive.

Now that you understand the different types of saturation, let's take a look at how to use them while tracking, mixing and mastering.
How To Use Saturation
Saturation is a powerful tool—not just for mixing, but for tracking and mastering as well. Especially with rock music, it's common to drive preamps to the point of distortion while tracking. Whether you're using a modern solid-state model or a classic tube preamp, saturation can help tracks like bass, electric guitar and vocals cut through the mix. Just be careful not to overdo it. Remember, you can always add more but you can never remove saturation from a recording.
Saturation can be used during mixing to thicken up the sound of a signal or even as a creative effect (like a distorted telephone vocal, for instance). Saturation is great for capturing a certain vibe, like using tube and tape saturation to give your mix a classic sound. Saturation can either be used to subtly enhance a track or completely destroy it for creative effect, making it a versatile mixing tool.
Mastering engineers often use saturation to help put the finishing touches on a track. Second-order harmonics like those generated by tubes can help enhance the low-end of a mix, while transistor saturation can help a bass-heavy mix cut through on small speakers. Tape saturation is great for gluing mixes together and can also be used to increase the perceived loudness of a mix without the pumping effect of compression.

Tips for Using Saturation While Mixing
Next, let's take a look at some tips for using saturation on different instruments, starting with the drums.
Saturation works well on drums for a variety of different genres. It can be used on the room mics or even the drum bus to give your track a loud, trashy rock and roll kind of vibe. But it's also great for helping 808s and electronic kicks cut through the mix. Tube saturation can add warmth and powerful low-mids, while transistor saturation can be great for adding upper harmonics that help tracks stand out on small speakers.
Similarly, you can use saturation on basses and bass synths to beef up the low-mids or give them a gritty texture that helps low-end cut through the mix. You can even use saturation plug-ins as a make-shift distortion pedal to kick things into overdrive for different sections of the song.
Much like basses, guitars can also benefit from some saturation. However, since distortion is such an integral part of many guitar tones, it's best to use a light touch. Saturation can help fill out the frequency response of a clean or thin-sounding guitar.
Keyboards—especially classic models like a Rhodes or Wurlitzer—also benefit from a little saturation. Since keyboards span such a wide range of frequencies, saturation can help add low-end to the high parts, and high-end to the low parts for a more balanced sound.
Vocals take especially well to tube saturation. The low-mids give most vocals a charming warmth that fits nicely in the mix. Just remember, a little goes a long way! It's easy to mangle your vocals beyond compare with harsh-sounding saturation. Parallel processing is a great way to retain the clarity of the original vocal while adding a bit of extra bite.
Last but not least, many engineers like to use summing mixers and tape machine emulation to add the finishing touches to a mix. By summing tracks through analog components, you're able to add rich second-order harmonics, while the tape machine adds additional third-order harmonics and often rolls off the highs for a smooth-sounding mix.
Try some of these tips during your next session to give your tracks a professional polish and a warm, rich tone.


