In the world of music production, achieving a warm, rich sound is often the goal of many producers and engineers. One of the key techniques to achieve this is through the use of saturation.
Saturation can add the much-desired warmth and character to your mixes, making them sound fuller and more engaging.
In this blog post, we will dive deep into the concept of saturation, explore various tools and techniques, and provide actionable tips to help you add warmth to your mixes.
Whether you're working on a delicate acoustic piece or a hard-hitting electronic track, understanding how to use saturation effectively can transform your mixes from good to great.

Understanding Saturation
What is Saturation?
Saturation refers to the process of adding harmonic distortion to an audio signal.
Originally derived from the analog days, when audio signals would pass through tubes, tape, or transistors, saturation introduces new harmonics that are musically related to the original signal.
This process not only changes the character of the sound but also adds a sense of warmth and richness that is often associated with analog recordings.

Types of Saturation
There are two main types of saturation: analog and digital.
Analog saturation comes from physical hardware, like tube amplifiers and tape machines, while digital saturation is achieved through plugins that emulate these analog processes.
Both types can be used to add warmth and color to your mixes, but digital saturation offers more flexibility and control in a modern DAW setup.
How Saturation Affects Sound Waves
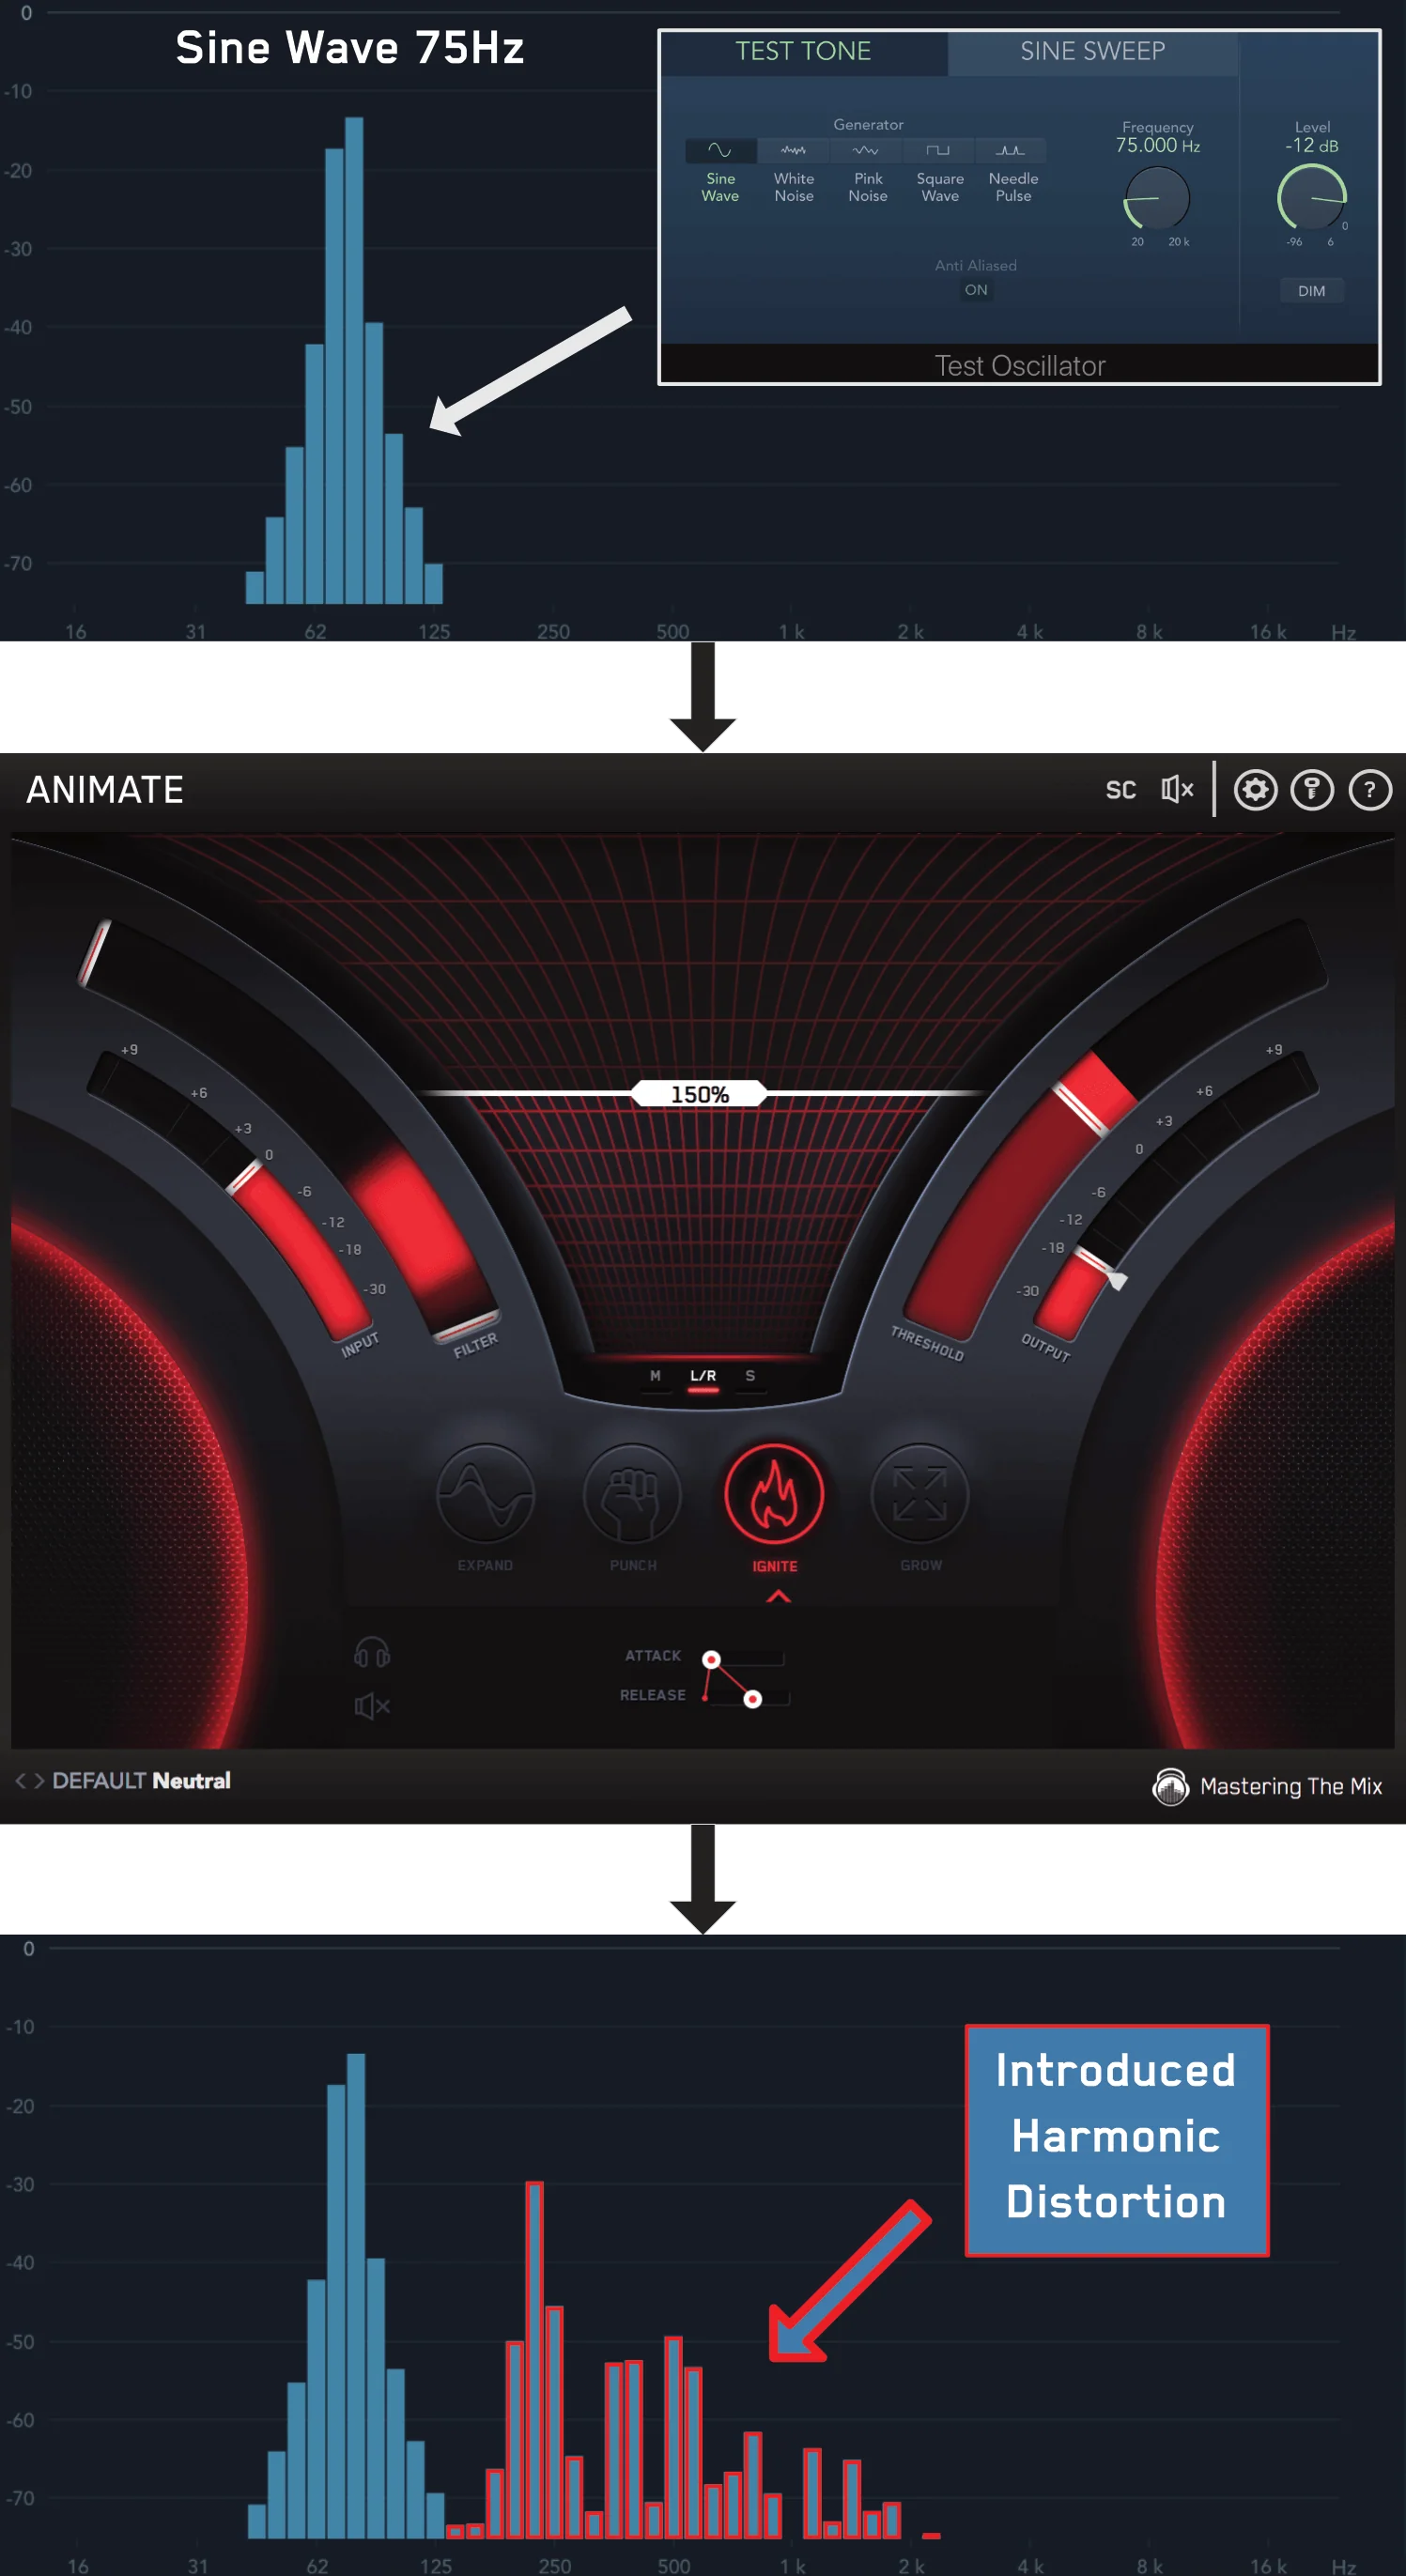
When an audio signal is saturated, it undergoes a mild form of distortion. This distortion adds harmonics to the original signal, enhancing its richness and complexity.
The harmonic content of a signal is what gives a sound its timbre, which is why different instruments have distinct sounds even when playing the same note.
By adding harmonics, saturation can make sounds more engaging and sonically interesting.
Benefits of Using Saturation
- Adds Warmth and Depth: Saturation can make digital recordings sound more natural and less sterile.
- Enhances Harmonics: Introducing harmonics can add richness and fullness to a mix.
- Smoothes Peaks: Mild saturation can help tame transients and smooth out peaks, making a mix sound more cohesive.
- Creates Character: Saturation can give your tracks a unique character, making them stand out.
Different Types of Distortion and Saturation
Distortion and saturation are often used interchangeably, but they encompass a variety of effects that can significantly alter the character of your audio. Understanding the different types of distortion and saturation can help you choose the right tool for the sound you're aiming to achieve in your mixes.
1. Tape Saturation
Tape saturation mimics the natural compression and harmonic enhancement that occurs when recording audio to magnetic tape. This type of saturation adds warmth, smooths transients, and introduces a subtle compression that can make your mix sound more cohesive. It is particularly useful for adding vintage character and warmth to digital recordings.

2. Tube Saturation
Tube saturation emulates the effect of running audio through vacuum tubes, commonly found in high-end analog gear. This type of saturation adds even-order harmonics, which can make the sound richer and fuller. Tube saturation is great for adding warmth and depth, especially to vocals, guitars, and bass.

3. Transistor Saturation
Transistor saturation is similar to tube saturation but typically adds odd-order harmonics, which can give a more aggressive and edgy sound. It is often used to add grit and punch to drums, bass, and synths. This type of saturation can help elements cut through the mix with more clarity and presence.

4. Overdrive
Overdrive is a mild form of distortion that produces a warm, gritty sound by pushing the signal into gentle clipping. It is commonly used on guitars and can also be effective on vocals and drums to add a touch of edge without overwhelming the natural character of the sound.

5. Fuzz
Fuzz is a more extreme form of distortion that produces a thick, saturated sound with heavy clipping. It introduces a significant amount of harmonics, making it ideal for creating a heavily distorted, almost broken sound. Fuzz is often used in rock and electronic music to create powerful, textured sounds.
6. Bitcrushing
Bitcrushing reduces the resolution of the audio signal, introducing digital artifacts and a gritty, lo-fi sound. This type of distortion is often used in electronic music and sound design to create unique textures and effects. Bitcrushing can make sounds feel more digital and experimental.
7. Harmonic Distortion
Harmonic distortion specifically targets the harmonic content of the signal, adding musically related harmonics to enhance the timbre. This type of distortion can be very musical and is useful for adding richness and complexity to any sound. Tools like IGNITE from Mastering The Mix allow you to apply harmonic distortion with precision, targeting specific frequencies for a tailored effect.

How To Get Started
Introducing IGNITE by Mastering The Mix
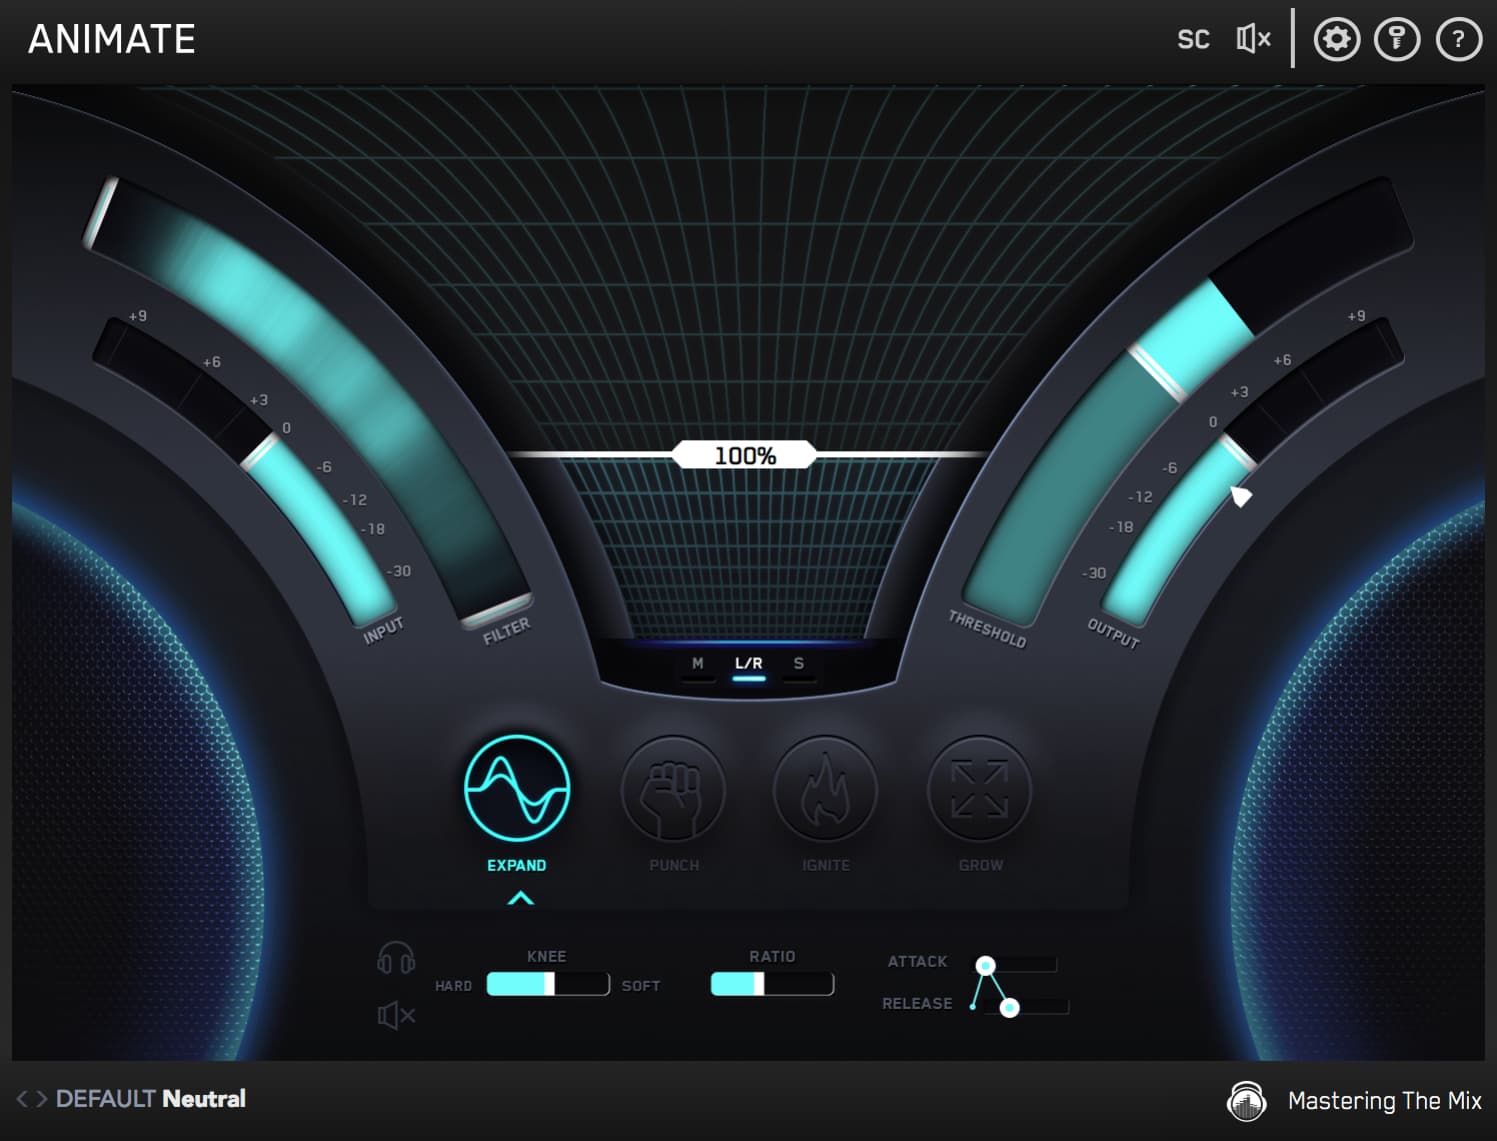
One of the most powerful tools for adding saturation and harmonic distortion to your mixes is IGNITE, a module within the ANIMATE plugin by Mastering The Mix.
IGNITE allows you to apply harmonic distortion with precision, targeting specific frequencies and adjusting the intensity to suit your mix.
What Exactly Does Harmonic Distortion Do to Audio?
The harmonic content of a signal determines its timbre. Harmonic distortion adds new harmonics that are musically related to the input signal, altering its timbre and adding richness.
For example, IGNITE introduces odd-order harmonics, which enhance the grit and add a rough edge to the audio, similar to analog tape saturation.
Why Does It Sound Amazing?
Listeners are naturally drawn to complex and interesting timbres. Harmonic distortion adds these complexities, making sounds more engaging and adding a layer of excitement and clarity.
This increased harmonic content gives the listener more sonic information to digest, making the music feel fuller and more immersive.
Using IGNITE for Total Control
Many distortion plugins offer limited control, often just slapping distortion across the entire signal. IGNITE, however, provides a high level of precision, allowing you to target specific frequency ranges.
For example, if you want to add presence to a bass track without affecting the low-end, you can isolate the upper range (200Hz-20kHz) and apply harmonic distortion only to those frequencies.

Quick Start Guide
To apply saturation using IGNITE:
- Load ANIMATE on Your Track: Select IGNITE as the module within ANIMATE on the track you want to enhance.
- Isolate Frequency Range: Use the high-quality all-pass filter to isolate the frequency range you want to affect.
- Adjust the threshold to ensure the signal is being affected. To affect the entire signal, set the threshold to the lowest amount.
- Adjust Amount Slider: Dial in the perfect amount of harmonic distortion.
- Fine-Tune Settings: Use the threshold, attack, and release controls to adjust how the distortion reacts dynamically to the audio signal.
This method allows you to bring out specific elements in your mix, such as adding clarity to vocals or making drums punchier, without muddying the low-end or overloading the entire signal.
Techniques for Adding Warmth
Subtle vs. Aggressive Saturation
The amount of saturation applied can vary depending on the desired effect. Subtle saturation can add a gentle warmth and glue to the mix, while more aggressive saturation can introduce noticeable distortion and character. The key is to apply saturation judiciously, enhancing the sound without overwhelming it.
Using Saturation on Different Elements
- Drums: Add saturation to drums to make them punchier and more aggressive. Focus on the snare and kick for added impact.
- Vocals: Use subtle saturation to add presence and warmth to vocals, making them sit better in the mix.
- Bass: Enhance the upper harmonics of the bass to improve clarity and definition, especially on smaller speakers.
- Guitars and Synths: Apply saturation to guitars and synths to add texture and interest.
Real-World Examples
Examples
Genre-Specific Techniques
- Electronic Music: Use aggressive saturation on synths and drums to add energy and drive.
- Rock: Apply saturation to guitars and vocals to create a raw, powerful sound.
- Hip-Hop: Enhance bass and drums with saturation to make them punchier and more defined.
- Pop: By using IGNITE to add saturation to the upper-mid frequencies, the vocals can cut through the mix better without increasing their volume, making them stand out and sound more polished.
Using Reference Tracks to Perfect Your Saturation
Setting the Right Amount of Saturation with Reference TracksOne of the most effective ways to ensure you're applying the right amount of saturation in your mixes is by using reference tracks.
Reference tracks are professionally mixed and mastered songs that you can compare your mix against. By using a high-quality reference track, you can gauge how your mix stands up in terms of warmth, depth, and overall character.
Introducing REFERENCE by Mastering The Mix
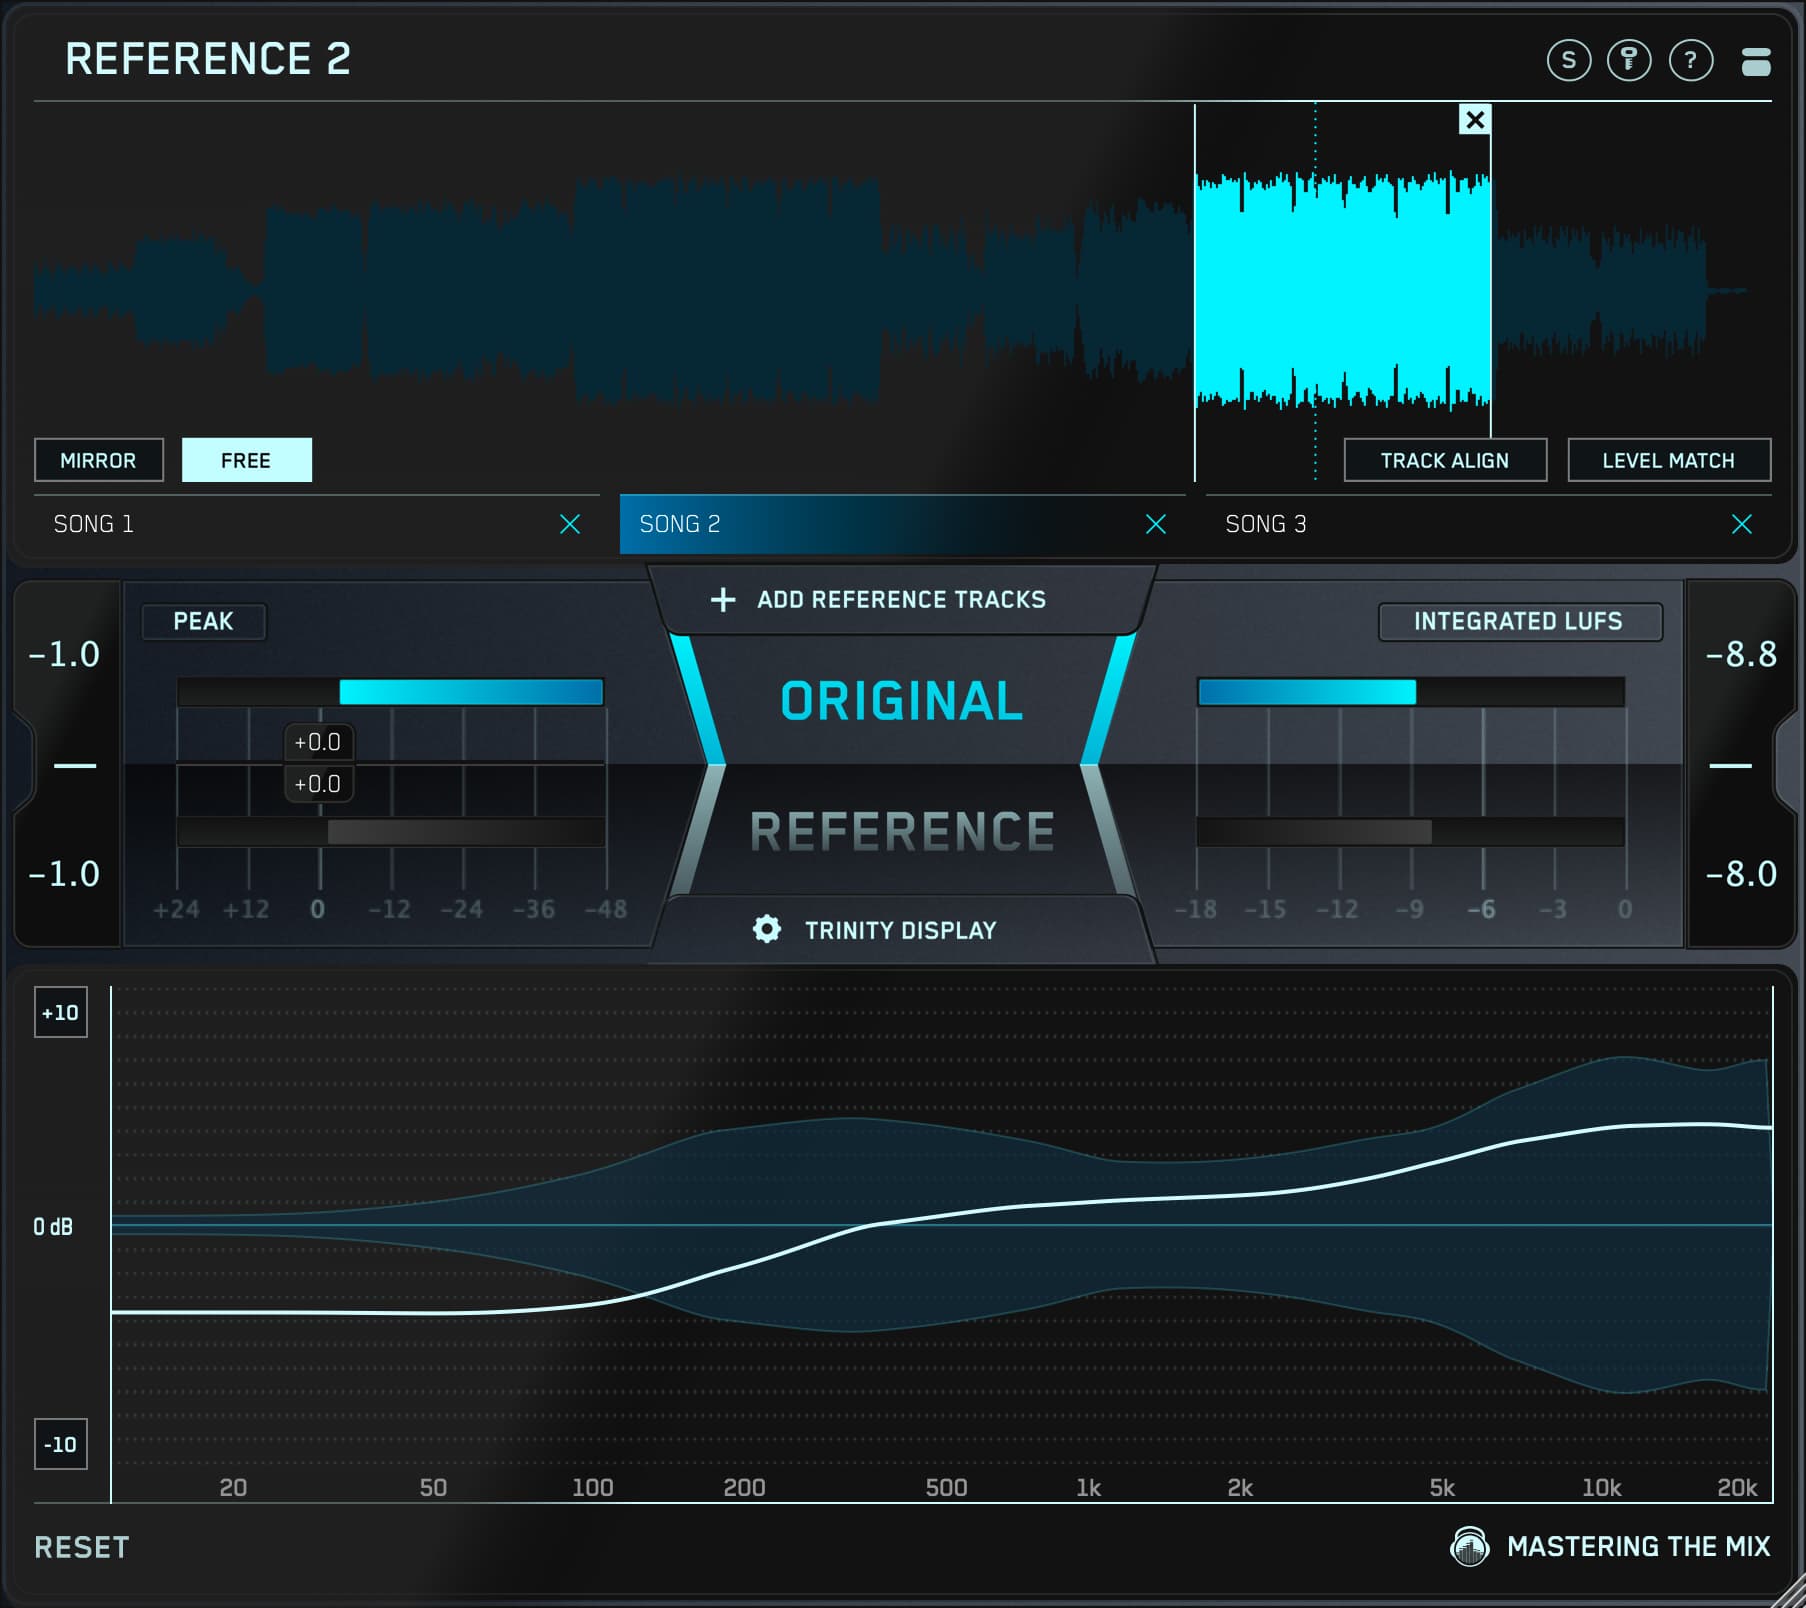
REFERENCE is a powerful plugin that allows you to compare your mix to your favorite tracks with precision. It helps you match the tonal balance, stereo width, and dynamic range of your mix to that of your reference tracks.
When it comes to adding saturation, REFERENCE can be an invaluable tool to ensure you're not overdoing it or underutilizing this effect.

Why Use Reference Tracks?
- Objective Comparison: Reference tracks provide a professional benchmark, helping you to make objective decisions about your mix.
- Consistency: Ensures your mix is consistent with commercially released tracks, making it sound polished and professional.
- Sonic Goals: Helps you achieve specific sonic goals by giving you a clear target to aim for.
How to Use REFERENCE for Saturation
1. Choose Your Reference Tracks Select a few reference tracks that match the genre and style of your mix. Ensure these tracks are well-mixed and mastered, as they will serve as your benchmark.
2. Load REFERENCE on Your Master Channel Insert REFERENCE as the last plugin on your master channel. This allows you to compare your entire mix to your chosen reference tracks.
3. Match the Perceived Loudness (...this is done for you) Before making any comparisons, match the perceived loudness of your mix to the reference track. This is crucial as our perception of saturation and warmth can be influenced by volume. REFERENCE automatically matches the loudness for an accurate comparison.
4. A/B Comparison Play your mix and the reference track back-to-back. Pay attention to the warmth and saturation levels in the reference track. Notice how the harmonic content and distortion contribute to the overall character and richness of the sound.
5. Adjust Saturation Accordingly Using IGNITE or your preferred saturation plugin, adjust the amount and type of saturation in your mix. Focus on matching the harmonic richness and warmth you hear in the reference track.
- Mid-Channel Saturation: If the reference track has a warm, rich mid-range, use IGNITE to apply saturation to the mid frequencies of your mix.
- Upper Harmonics: If the reference track has clear and present high frequencies, ensure your saturation enhances these without introducing harshness.
6. Fine-Tune with EQ and Compression After applying saturation, use EQ and compression to shape the harmonics and control the dynamics. REFERENCE can help you ensure these adjustments keep your mix in line with the reference track.
Practical Example
Suppose you are working on a pop track and want to add warmth to the vocals. Load a reference track with a vocal sound you admire. Using REFERENCE, compare the harmonic content of the vocals in your mix with the reference track.
Apply saturation using IGNITE, targeting the mid to high frequencies of the vocal track.
Continuously A/B test using REFERENCE to ensure you are enhancing the vocals without making them sound harsh or distorted.

Why This Matters
Using reference tracks helps you stay grounded and ensures that your creative choices lead to a professional-sounding mix.
REFERENCE by Mastering The Mix makes this process straightforward and efficient, providing visual and auditory feedback to help you make informed decisions.
Common Pitfalls and Troubleshooting
Over-Saturation
Over-saturation can lead to a muddy, distorted mix. It's important to apply saturation subtly and incrementally, checking the results frequently.
Avoiding Digital Artifacts
Digital artifacts can occur if saturation is applied too aggressively. Use high-quality plugins like IGNITE to minimize these artifacts and maintain a clean sound.
Balancing with Other Effects
Ensure that saturation complements other effects like EQ and compression. For example, apply EQ to shape the harmonics introduced by saturation, and use compression to control the dynamics.

Advanced Saturation Techniques
Multiband Saturation
Multiband saturation allows you to apply different amounts of saturation to different frequency bands. This technique can help you achieve a more balanced and controlled sound.
Parallel Processing
Parallel processing involves blending a saturated signal with the dry signal. This can add warmth and character without overwhelming the original sound.
Combining Effects
Combining saturation with other effects like compression and EQ can create a more polished and professional mix. For example, use compression to control the dynamics of a saturated signal and EQ to shape its tonal balance.

Conclusion
Incorporating saturation into your mixes can transform sterile, lifeless recordings into warm, rich, and engaging tracks. By understanding and utilizing the different types of distortion and saturation, you can add depth, character, and professionalism to your music.
Recap of Key Points:
- Understanding Saturation: We explored how saturation adds harmonic content to your audio, enhancing its warmth and character.
- Types of Distortion and Saturation: Knowing the different types of saturation—tape, tube, transistor, overdrive, fuzz, bitcrushing, and harmonic distortion—helps you choose the right tool for the job.
- Tools for Saturation: ANIMATE by Mastering The Mix offers unparalleled control over harmonic distortion, allowing you to apply saturation precisely where needed.
- Techniques for Adding Warmth: Applying saturation to different elements in your mix, from drums to vocals, can help each part stand out while maintaining a cohesive sound.
- Using Reference Tracks: Using REFERENCE by Mastering The Mix ensures your saturation levels match professional standards, providing an objective benchmark.
- Common Pitfalls and Troubleshooting: Avoid over-saturation and digital artifacts by applying saturation judiciously and balancing it with other effects.
- Advanced Techniques: Multiband saturation, parallel processing, and combining effects can add further refinement to your mixes.
Saturation is a powerful tool that, when used correctly, can elevate your music to new heights. By experimenting with different types and techniques, you can find the perfect balance that brings warmth, depth, and character to your tracks.
Take your mixes to the next level with ANIMATE and REFERENCE by Mastering The Mix. These tools provide the precision and control needed to apply saturation effectively and ensure your mixes stand up to professional standards. Try a free trial today and explore the full potential of your music.
For more tips, expert advice, and updates on the latest in music production, sign up for our newsletter. Let us help you master the mix and achieve the best sound possible for your music.


