One of the best things you can do for yourself is to make your whole production process more efficient. This, in turn, will make you faster, more confident in the decisions you make. As a bonus, it’ll also shorten the time you spend on each project.
In this article, we’ll look at a few tips that will streamline your production process.
Templates
Templates are still frowned upon in the music industry. Some people say that having tracks, routing, processing, and effects set up ahead of time can make you less creative, and that it’s a sign of being a lazy producer/engineer.
If anything, using templates allows you to be even more creative by making your tools available to you for when inspiration strikes. This, in addition to removing the soul-crushing experience of having to re-create the same project every time.
In order to make your own templates, take a look at your last 5-10 projects. If you do more than just production, or just mixing, look at a bunch of projects from each of these areas.
Look for commonalities between the projects. Do you always use the same virtual instrument for your realistic bass sounds? (I’m looking at you, Trilian)
Do you have the same parallel compression processing chain for your lead vocal?
How about the reverbs and delays? Do you happen to be drawn towards the same plugins over and over again?

How About Routing?
Use these as hints that you like certain things a certain way. Build them into your template.
Colorize and Label Your Tracks Consistently
This kind of goes with the previous tip. Stick to always coloring, labeling and arranging tracks the same. This way, you’ll always find your track, without having to read through track names. You’ll first look at the colors, then you’ll immediately gravitate towards the right track purely based on instinct. You’ll know the kick track is always above your snare, and underneath the drum buss. My drums are red, bass is blue, lead vocals are purple, effects are orange, and so on.

Save New Default Settings For Your Plugins
Do you tend to roll-off the low end on most of your tracks? Save a new default setting on your trusty EQ with the low-cut engaged and set to…40Hz, for example.

Channel Strips To The Rescue!
I generally save channel strips when they contain a specific processing chain used to achieve a cool effect.
Some mixing engineers get to work on tracks recorded in the same studios, with the same session players performing the songs. Maybe the room sounds always need the same processing in order to clean them up. Save that chain as a channel strip to save your future-self time.

Learn Your DAW And Its Shortcuts
This can be boring, yes. However, removing the time between wanting to do something and actually doing it is worth the time spent learning what your DAW can do and how it can be done. Additionally, if your DAW is as awesome as the one I use is (reaper for the win!), you can further improve the speed at which you work by creating macros and scripts. Yes, scripts, as in programming. Mind.Blowing.
Watch tutorials on how to use your DAW better and more efficiently. Make a conscious effort to know it by heart so it becomes an extension of your intention.

Switch Up Your Listening Environment
Changing how you hear your work gives you another perspective on it. If you can only work on headphones, consider getting Audified’s MixChecker Pro. This is a plugin that lets you monitor your song through emulations of various speakers and headphones, in multiple environments, such as cars, clubs and on the street.

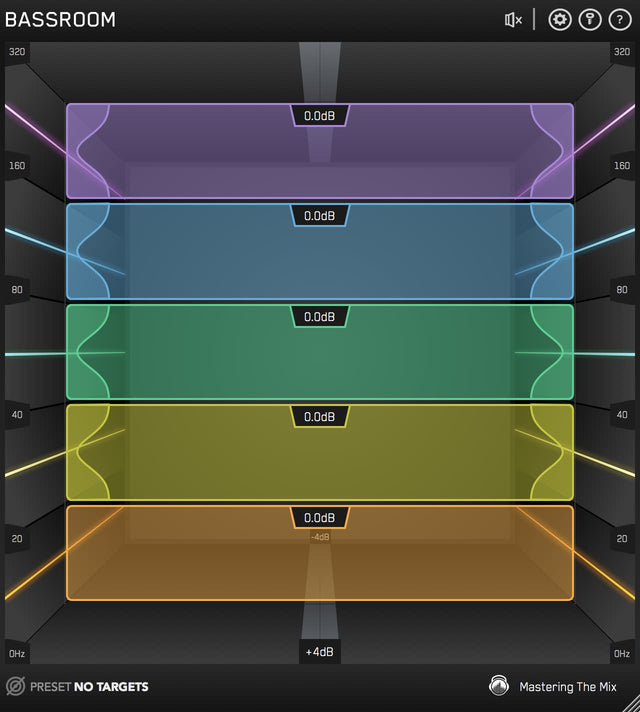
BASSROOM Lets You Get The Low-End Right
If you’re the one writing, recording and producing your own song, there’s a strong chance you’ll be mixing as you go. How many times did you realize you completely lost perspective of the overall sonics of the song?
Low end is usually the area where most people drop the ball. Inaccurate speakers/headphones, a poorly treated space, and not knowing how to deal with the low frequencies, these all lead to the foundation of the mix suffering.
BASSROOM makes it easy to make final tonal adjustments once you’re happy with the mix.

Make A List
There’s a question that plagues every beginner: how do I know the song/mix is finished? Generally, art is abandoned, never finished. And that’s good. Striving to get the mix 100% of the way there WILL start ruining it. Once you get to the point where you can’t decide whether the pad should be 0.3dB louder or quieter in the bridge, you’re probably done.
To ease the pain of not knowing when to call it a day, make a list.
Take a 10-15 minute ear break, then get a pen and paper. Play the song start to finish, without making any changes. Listen and make notes. “Add modulation to the guitar in the intro”, “lead vocal too loud in verse 1”, “gunshot too quiet in the bridge”, “bass too muddy during the choruses” and so on.
Once you’ve addressed all your notes, take another break, and start over.
You’ll eventually get to the point where your notes are either entirely subjective, or there won’t be any notes. That’s when you can send the song to your client, if you’re mixing for someone else.

MIXROOM Is A Smart EQ
MIXROOM is the way to go for fast, guided EQing. The plugin works on both individual tracks and the whole mix. You get suggestions as to how to tame the low mids, how to get a sparkling top-end, and more. If this is cheating, I don’t mind it.

Backward/Top-Down Mixing
Bored audio people like to argue about this topic. What’s the best way to start a mix?
Ideally, you start with the most important element of the track. Generally, that’s the lead vocal. Others say you should start with the foundational elements, such as the kick, snare and bass.
Don’t EQ and compress your tracks in solo. It doesn’t matter if your piano sounds lush and full of life when listening to it by itself, if, when in context with the rest of the tracks, it’s muddy and masking the vocal.
Regardless of the camp you’re in, once you’ve built your static mix (level and panning), it’s best you first listen to the song, analyzing how the lead vocal sits with the rest of the elements. Fix the lead, then listen to the next most important element. Keep doing this until you’ve gone through all the tracks.

Reference, Reference, Reference
Mastering The Mix’s REFERENCE lets you compare your song with commercially successful tracks. Doing so will help you reach your goal faster, and more accurately than working in a vacuum does. Your work will always be compared to other tracks in the genre.
What I love about REFERENCE is that it level-matches the songs by default. If your reference track is louder than the mix you’re working on, you won’t be able to make accurate comparisons between the two.

Project Management
Without having a clear way of dealing with the administrative side of things, your projects will eventually get lost in the mess. I find this to be especially true for my own music, where I must date the project, then add a label. If I don’t, I won’t remember which project is which.
1. Set your DAW to autosave every few minutes, less than 10. You want to lose as little progress as possible in case of a crash (I’m looking at you, Bro Tools). Also, make CMD+S/CTRL+S a habit. Save manually, and have autosave work for you as well.
2. Have clear, consistent file names: Song : Artist [Version number] DATE (OPTIONAL LABEL {less bass, louder vox, rock track, etc})

3. Back Up Your Work.
- Consider using Dropbox/Google Drive as a first backup destination.
- Get software that automatically backs up your files, such as CarbonCopyCloner for macOS and Aomei Backupper for Windows.
- Use Backblaze to backup the backups. Yup, it’s necessary.
4. Clean your room. Clear your desk. Clear your computer desktop. Organize your computer files.
5. Keep distractions at a minimum. Set a time to check your emails and try to stick to that. Set your phone to Do Not Disturb.
Use EXPOSE
…to check the files before you send them to the client. EXPOSE will tell you if there are any phase issues. That’s not all! EXPOSE also reveals true peak clipping, warns if the EQ balance is poor, if the track is too loud or too quiet, and more. What’s extra-cool is that it also shows you how the tonal balance of your song compares to your references.

Don’t Waste Your Time Endlessly Watching Tutorial Videos
Seriously. This is a trap many of us fall into from time to time. Educate yourself! And then apply what you just learned. There’s no point in watching 5 hours’ worth of tutorials, only to then forget all of it. Watch a tutorial, have your DAW open and practice alongside the video. Otherwise, you risk procrastinating, whilst lying to yourself that you’re making progress. That’s not good for anyone.

Conclusion
You’ve just read a bunch of tips that will help streamline your process so you finish your songs faster. Now read the article again and implement it step by step. I suggest you start with tidying up your room, then your desk space.
Have fun and treat your clients right!
---
By Mastering The Mix Contributor - Tiki Horea

Starting off as a drummer and continuing as an engineer, I've been involved in the music industry all of my professional career. I fell in love with mixing and mastering other artists’ music. Every musician deserves to get goosebumps when they listen back to the finished mixes. This is what gets me up in the morning.


